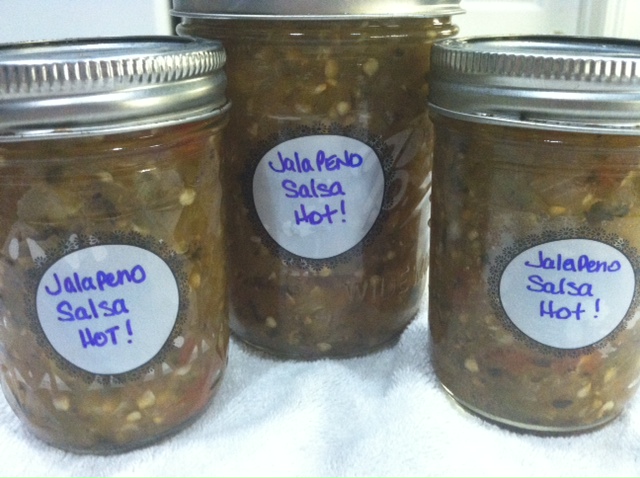
I have wanted to make this recipe for so long. I was afraid that it would be so hot that I wouldn't be able to serve it to anyone or even give it away. I bit the bullet this time and decided that since jalapeno's were so inexpensive I would give it a go. I used my food processor to mince up the jalapenos, onions, and garlic. It worked like a charm to get the veggies prepped.
The flavor of this is really amazing. Yes, it's hot but not so much that you can't taste all the other elements of the salsa. This could definitely be kicked up a notch by subbing out 1 cup of the jalapeno for 1 cup of habanero peppers. I will put this on the shelf for a couple weeks and try them again to see if the flavor changed.
Jalapeno Salsa
3 cups peeled, seeded, cored, and chopped tomatoes
3 cups minced jalapenos, keeping seeds and ribs
1 cup minced onion
6 cloves garlic, minced
2 tbsp dried cilantro
1 /2 tsp salt
1/2 tsp cumin (i omitted)
1 cup cider vinegar
Preparation: Prepare 4 pint jars (I used 2 pints and 4 half pints), lids, and rings. Sterilize the jars and keep them in the hot water till it’s time for processing. Make sure to fill your water bath canner and get the water to a simmer. Using a food processor or knife mince jalapenos, garlic, and onion. Prepare your tomatoes.
Cooking: In a large stainless steel or enameled dutch oven combine all the ingredients. Bring to a boil gently, stirring often, then reduce to a simmer for 20 until the liquid is reduced by half. Remove from heat.
Filling the jars: On a dishtowel place your hot jars and using your funnel in each jar fill leaving 1/2” headspace. Remove air bubbles and refill to the proper headspace if necessary. Taking a clean papertowel wet it with warm water and wipe the rims of the jars removing any food particles that would interfere with a good seal. Using your magic wand extract the lids from the hot water and place them on the now cleaned rims. Add your rings to the tops of each of the jars and turn to seal just "finger tight".
Processing: Make sure your rack is on the bottom of the canner and place the jars in the water bath making sure that the water covers each of the jars by 1 to 2 inches. Add hot water to the canner if it doesn't measure up. Cover the pot and turn up the heat under the canner and wait for the water to start boiling. Once the water has come to a boil start your timer for 15 minutes. When complete turn off the heat and remove the cover and let the jars sit for another few minutes. Remove the jars and place them back on the dishtowel in a place that they will sit overnight to cool. Do not touch or move them till the next morning.
Sealing: Sometime in the next hour your jars will be making a "pinging" or "popping" noise. That is the glass cooling and the reaction of the lids being sucked into the jar for proper sealing. Some recipes may take overnight to seal. Check your lids and reprocess any jars that did not seal.
Labeling: Make sure to label your jars after they have cooled with the name of the recipe and the date canned. If you want to use the shrink labels in the picture you can order them Here!
Popular Posts
-
One of my favorite soups is Clam Chowder and the idea that I wouldn't have to spend all day working on getting that soup cooked, creamed...
-
One of my favorite desserts and a very popular treat in my family is the holiday pecan pie. This year my sister made the pie and it was so s...
-
With all the great citrus coming this winter many of my followers are desperate to do something with their oranges. Many people are up to th...
-
Homemade Chocolate Syrup/Sauce Ingredients 1 1/2 cups water 3 cups sugar 1 1/2 cups Dutch-processed cocoa 1 tablespoon vani...
-
Last week I asked for a Crock Pot version for some followers that want to make Apple Butter. I received quite a few and wanted to get this r...
-
Chicken is simple to 'put up" in the pressure canner and sometimes changing up the flavor to complete more of base for a future me...
-
How to get started canning is fairly easy. You can do research and figure out whether or not this would be something that you would enjoy...
-
Shari sent me this Sweet Pickled Visalia Onion recipe and I had to share since who doesn't love Vidalia Onions! Shari's twist on a c...
-
A few of my Facebook followers have shared some concern about opening jars and finding black or brown spots on the underside of their cannin...
-
On June 24, 2015 the University of Wisconsin Extension program published their testing for the thorough work they performed using the cont...


.JPG)


