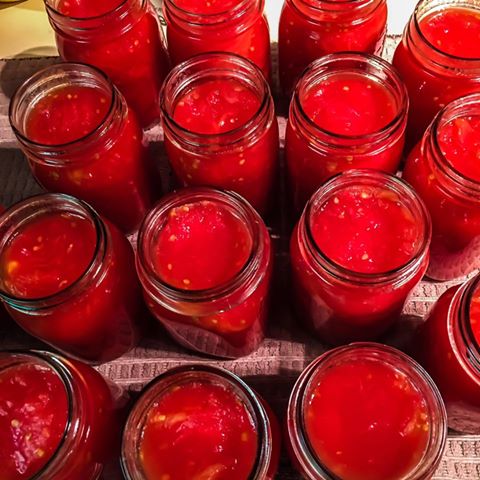
I have posted how to can diced tomatoes but putting up crushed tomatoes is just as fulfilling and is much more simple than all that dicing!
I had the fortune to see a posted picture of the amazing color and amount of work that Doug did in canning his early tomatoes from a farm in Tucker, Georgia. It inspired me to get the recipe posted for my followers to enjoy! Thank you Doug for allowing me to use your photo!
Crushed Tomatoes - no liquid added! (NCHFP)
Quantity: An average of 22 pounds is needed per canner load of 7 quarts;
an average of 14 fresh pounds is needed per canner load of 9 pints. An
average of 2¾ pounds per quart.
Preparation: Wash tomatoes and slit a cross in both ends of the skin.
Dip in boiling water for 30 to 60 seconds. Dip in ice cold water and slip off
the skins and remove cores.
Cooking: Heat in quarter batches quickly in a large pot,
crushing them with a wooden mallet or spoon as they are added to the pot. This
will exude juice. Continue heating the tomatoes, stirring to prevent burning.
Once the tomatoes are boiling, gradually add remaining batch, stirring
constantly. These remaining tomatoes do not need to be crushed. They will soften
with heating and stirring. Continue until all tomatoes are added. Then boil
gently 5 minutes.
Filling the jars: On a dishtowel place your hot jars and using your
funnel, ladle to fill to 1/2" headspace. When packing crushed
tomatoes into hot jars , add 1 tsp salt and 2 T lemon juice or 1/4 t. of citric
acid to each quart jar, or 1/2 t. salt and 1 T lemon juice or 1/8 t.
citric acid for each pint jar. Pack tomatoes into jars, leaving 1/2 in
headspace. Remove air
bubbles and refill to the proper headspace with the mixture if necessary.
Taking a clean papertowel wet it with warm water and wipe the rims of the jars
removing any food particles that would interfere with a good seal. Using your
magic wand extract the lids from the hot water and place them on the now
cleaned rims. Add your rings to the tops of each of the jars and turn to seal
just "finger tight".
Processing: Make sure your rack is on the bottom of the canner and
place the jars in the water bath making sure that the water covers each of the
jars by 1 to 2 inches. Add hot water to the canner if it doesn't measure up.
Cover the pot and turn up the heat under the canner and wait for the water to
start boiling. Once the water has come to a boil start your timer for 45
minutes for quarts and 35 minutes for pints. (0-1000ft) When complete turn off
the heat and remove the cover and let the jars sit for another few minutes.
Remove the jars and place them back on the dishtowel in a place that they will
sit overnight to cool. Do not touch or move them till the next morning.
Sealing: Some time in the next hour your jars will be making a
"pinging" or "popping" noise. That is the glass cooling and
the reaction of the lids being sucked into the jar for proper sealing. Some
recipes may take overnight to seal. Check your lids and reprocess any jars that
did not seal.
Labeling: Make sure to label your jars after they have cooled with the
name of the recipe and the date canned.


.JPG)


