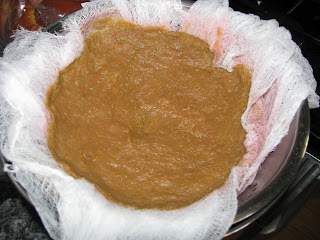
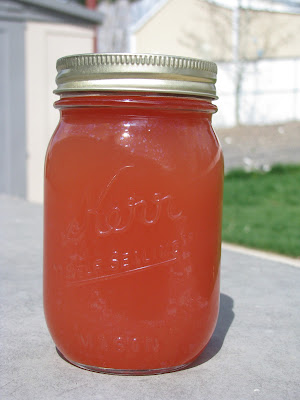
From Pj: I used the frozen rhubarb I had, so it broke down more than I think fresh would. I let it drain overnight with the cheesecloth. I couldn't find a jelly bag anywhere in town-they must not think it 'in season' yet.
I was thinking that the concentrate was going to turn out that baby poo grey-green, and there was no way we'd ever use it, but when i checked it in the morning, I was surprised that it was such a rosey pink. The recipe said it would make 4 pints, but i got 3 1/2. I processed 3 and made up the 1/2 pint.
The taste is a bit different. There's a slight veggie aftertaste, but that may just be the rhubarb, or the fact that I always dilute down our juices, even store bought (which I'm hoping I won't have to buy this year). =) This might be one that you have to play with how dilute you make it, and I think that if you diluted it with gingerale it would be really good, but since the hubs drank all that I couldn't try it."
 Sunshine Rhubarb Juice Concentrate
(Yield: About 4 pint jars)
12 cups sliced rhubarb
4 cups water
Grated zest and juice of 1 lemon
Grated zest and juice of 1 orange
1½ cups sugar
In large pot, combine rhubarb, water, lemon & orange zests and bring to a boil. Stir constantly over medium high heat. Reduce heat, cover and boil gently until rhubarb is soft, about 10 minutes. Remove from heat and stir in lemon juice and orange juice.
Pour into dampened jelly bag or strainer lined with several layers of cheesecloth set over a deep bowl. Let drip for at least 2 hours, undisturbed.
In clean, large pot combine rhubarb juice and sugar. Heat to 190° F. Stir to dissolve sugar, but do not boil. Remove from heat and skim off foam.
Ladle into hot jars, leave ¼-inch headspace, clean rim, place lids and screw bands.
Place jars in prepared canner, with jars completely under water. Bring to a boil, reduce heat to maintain gentle boil and process for 20 minutes*. Turn off heat and remove canner lid. Allow jars to sit in canner for 5 minutes before removing. Set jars on rack or towel out of drafts and allow to cool. Remove screw band, label and store.


